
Welcome to the April newsletter and the start of spring! Well, sort of. We were hit by an ice storm just this past weekend and our power has just come back on. Winter is taking one last shot at us on the way out.
This newsletter is all about what to do with your winter sown seeds now that spring has arrived.
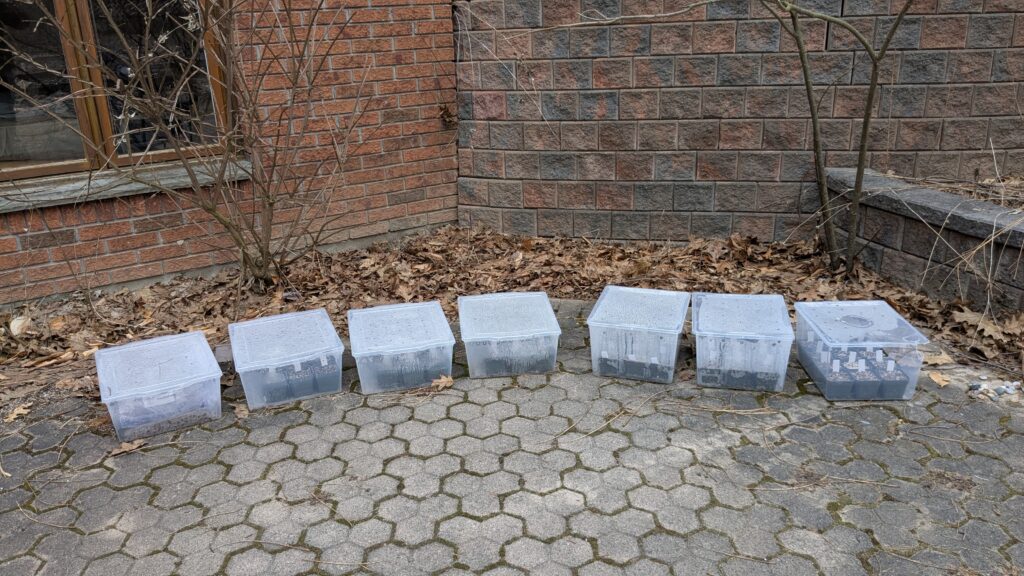
Last year was the first time I tried winter sowing. I placed 12 species into one clear plastic box with ventilation and drainage holes. The results were so good that this year I have seven boxes and a total of 80 different species. Last year’s seedlings were all very robust and healthy. They didn’t need any hardening off since they were already outside and acclimatized to cool temperatures. The whole process is more closely aligned with what the plants are doing in nature, while providing some protection from hte animals that would like to snack on your seeds.
So our winter sowing containers have been lying forgotten in a snowbank all winter. Now that spring is here it is time to remember them.
Moisture
The first thing you want to do is check that the soil is still moist in your containers. Once the seedlings start growing they will need to be watered on a regular basis. You can water them from the bottom by setting them in a pan of water and the soil will soak up the moisture. Don’t leave them sitting in the water for more than a few hours. You can also mist the surface of the soil. Make sure not to wash your seeds away by pouring water over the surface of the soil.
Location
I have my containers placed on the east side of my house so they get the morning sun but are in the shade for the rest of the day. Winter sowing containers act like mini greenhouses. They can heat up and scorch your tiny seedlings. I recommend putting them in the shade or where they get just a little sun. If the day is warm you can take the lid off or open it up a bit to release the heat.
Germination
Each species has its own timing for when it will germinate. Yarrow (Achillea millefolium) has started germinating already in my containers. Tall Anemone (Anemone virginiana) and Long-headed Anemone (Anemone cylindrica) will likely germinate a week or two after everything else has germinated. Some species (usually the spring ephemerals) may even need a second winter and will germinate next year.

Transplanting
Eventually you will need to transplant your seedlings into new pots where they will have more room to grow. This is the step that is the most work and time consuming part of winter sowing.
You can transplant your seedlings while they are still small, but they can be very tiny and fiddly. I use tweezers to very gently handle tiny seedlings. I try to loosen the soil around the seedlings first, and then separate them and plant them into new pots.
You can also wait until they are a little larger, when their first true leaves appear. Depending on how densely you seeded your containers, the roots can get very tangled and may be hard to separate.
You will want to handle your seedlings by the leaves. If part of a leaf breaks off the seedling will usually be fine. If you’re handling them by the stems and the stem breaks, the seedling often does not recover.
Keep your newly potted seedlings out of direct sun for a week while they are recovering from transplanting.
Planting into the garden
After a month or so in their pots many of your seedlings will be ready to be planted in the garden. Choose a cool, overcast day for planting. Water your seedlings well in their pots. After you have planted them in the garden, water them again to make sure the soil settles in around the roots. For the first few weeks keep an eye on them and don’t let them dry out too much while they are establishing their root systems. I like to put a one or two inch layer of leaf mulch around my plants to help protect the soil and keep it moist.
If you have any questions about winter sowing, or about native seeds in general, please feel free to send me an email!
Happy spring!
Andrea D’Silva